Two weeks ago, Microsoft released a new awesome functionality within Azure Active Directory which we can use within Conditional Access and is called ‘Protected Actions’. Luckily, I had the chance to test this new feature in the early private preview stages, and I’m very excited this feature is now available in Public Preview!
Today attackers can take advantage of unsecured roles and perform privileged operations to gain access to organizational resources and important security infrastructure. With Conditional Access we can target protections for the Azure portal sign-in, roles and apps, but not based on the specific user actions executed within the Azure AD portal.
According to the zero-trust model we need to assume a breach will happen, with Protected Actions we give Conditional Access the ability to target individual high-risk actions in the Azure AD Portal and with that provide a defense in depth approach to protecting high-impact actions and deliver the most optimized security for highly sensitive operations.

Please be aware that for the use of this feature you’re using the supported portals and Microsoft Graph applications once you’re going to implement this for your admin accounts. Today the Protected Actions feature can be used at the following portals or with the following applications:
- The Azure Active Directory Portal
- The Microsoft Entra Portal
- Microsoft Graph PowerShell
- Microsoft Graph Explorer
Now we know what Protected Actions can offer, where we can use them, let’s look at some of the requirements and limitations which there are today:
- You need an Azure AD Premium P1 license as we are using integration with Conditional Access.
- You need to move your MFA Trusted IP’s to Named Location(s) in Azure Active Directory
- Just implementing Protected Actions is not sufficient, it’s defense in depth and Protected Actions is just a part of that.
- The Azure PowerShell module is not supported and sign-in will fail when a Protected Action is applied.
- The Azure AD PowerShell module is not supported and sign-in will fail when a Protected Action is applied.
- Creating a new terms of use page or custom control in the Entra admin center or Azure portal will fail as these are registered with Conditional Access to create, update or delete actions.
- This feature is today limited to the permissions in the table below.
| Permission | Description |
| microsoft.directory/conditionalAccessPolicies/basic/update | Update basic properties for conditional access policies |
| microsoft.directory/conditionalAccessPolicies/create | Create conditional access policies |
| microsoft.directory/conditionalAccessPolicies/delete | Delete conditional access policies |
| microsoft.directory/namedLocations/basic/update | Update basic properties of custom rules that define network locations |
| microsoft.directory/namedLocations/create | Create custom rules that define network locations |
| microsoft.directory/namedLocations/delete | Delete custom rules that define network locations |
| microsoft.directory/resourceNamespaces/resourceActions/authenticationContext/update | Update Conditional Access authentication context of Microsoft 365 role-based access control (RBAC) resource actions |
Now let’s dive in and see how we can configure and use Protected Actions in three simple steps.
Step 1: Prepare ‘must have’ defense options and requirements for Protected Actions.
As Protected Actions is only a part of your defense in depth journey, let’s first make sure you have at least implemented some ‘regular’ CA policies to make sure the basics are in place.
The first policy you should have, is the MFA for Admin portals, in general this is the Azure Portal but can also contain other admin portals which are connected to your tenant. In this case make sure this policy is targetted to all users and make sure the break the glass account is excluded, next make sure that the Microsoft Azure Management App is included and next make sure to at least require MFA, but preferably use the authentication strength ‘Phishing-Resistant MFA’ to make sure access to this portal is protected.

The second policy you should have, is the MFA for Admin Roles, in general these are all the users who have an active Microsoft 365 Role assignment. In this case make sure this policy is targeted to all admin roles except the ‘Directory Synchronization Accounts’ and make sure the break the glass account is excluded, next make sure that all Cloud Apps are included and next make sure to at least require MFA, but again preferably use the authentication strength ‘Phishing-Resistant MFA’ to make sure access to this portal is protected.
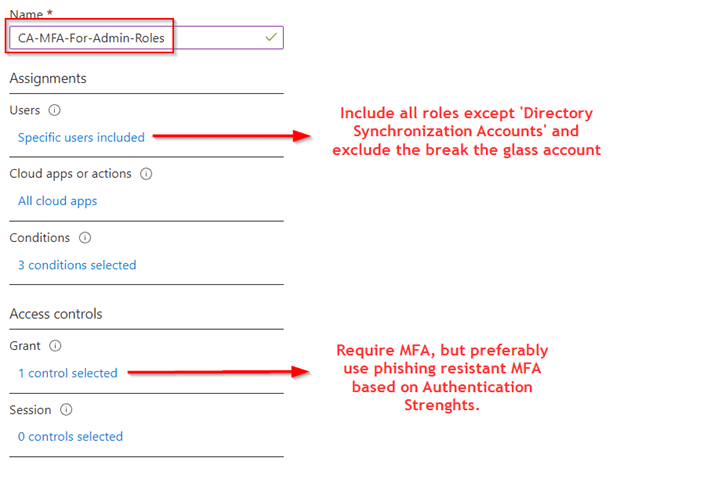
At last, both policies must (or can) be enhanced by configuring the ‘sign-in frequency’ under session controls. This should be configured within each conditional access policy shown above so you need to re-authenticate after a specific amount of time. My advice is always to put this value between 4-9 hours, where you need to find the right balance between productivity and security.

Once the right admin controls and conditional access policies are in place, the second step is to ‘migrate’ the trusted IPs from the legacy MFA portal to ‘Named Locations’. This is not mandatory but highly recommended so you can apply the right controls via ‘protected actions’ to the creation, updates or deletions of named locations and therefore the ‘Trusted IPs’. To do this you can follow the following process:
- Validate if the IP addresses on the legacy MFA portal are still actual, we don’t want IP’s in there which aren’t owned by you.
- Created one or more named locations in Azure AD and put the IP’s from the legacy MFA portal in the named location(s).
- Configure the conditional access policies which do require Multi-Factor Authentication to exclude the named location(s) you just created. Please be careful with making this exclusion and only apply them if really necessary (IP Spoofing can easily be used by attackers).
- Once implemented, remove the old IP address from the legacy MFA portal, whereby the migration is completed.

Now the environment is prepared, let’s go and configure the Protected Actions in the next step.
Step 2: Configure your Protected Actions and Conditional Access Rule
Now we made sure that we at least provide some form of defense in depth, let’s configure the Protected Actions. For that we first need to create a new ‘Authentication Context’. Therefore, go to ‘Protect & Secure’ on the Entra portal, click on ‘Conditional Access’ and hit ‘Authentication Context’. In here we can add a ‘+ New authentication context’.

We can provide it a ‘Friendly Name’, give it a ‘Description’ and we can ‘Publish’ the context to applications, this so it becomes usable within the platform. The latter is important to be turned on, as without publishing we can’t go to the next step. At last, select an ‘ID’, this is just a number which it gets on the backend, in total there are 25 which means you can have up to 25 Authentication Contexts. Once ready, hit ‘Save’.

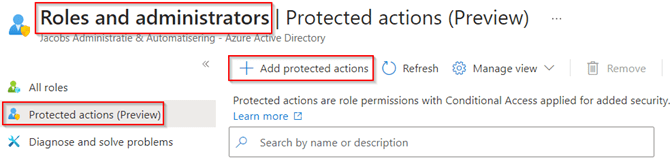
Now the ‘Authentication Context’ is created, let’s make sure we are tagging the action (permission) with the Authentication Context just created. For that go to ‘Roles & Admins’ on the Entra portal, hit ‘Roles & Admins’ and select ‘Protected Actions’. In here hit ‘+ Add protected actions’.
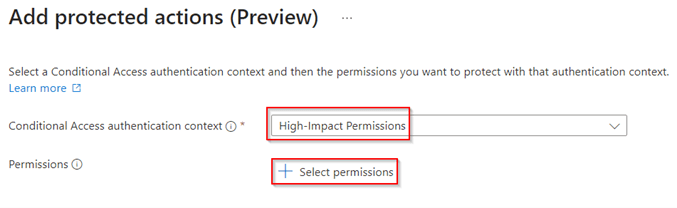
In here select the ‘Authentication Context’ we just created called ‘High-Impact Permissions’ and hit ‘+ Select permission’.
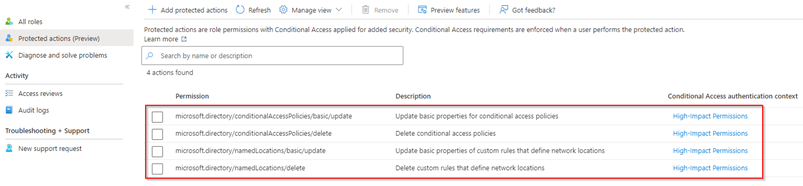
In the pane which pops-up we can select the different permissions which supports to have an ‘Authentication Context’ applied. In my case I’ve selected only the ‘update’ and ‘delete’ permissions as you can see, this as I want to make sure that the existing policies can’t simply be ‘updated’ or ‘deleted’. Once ready hit ‘Add’ and next hit ‘Save’.
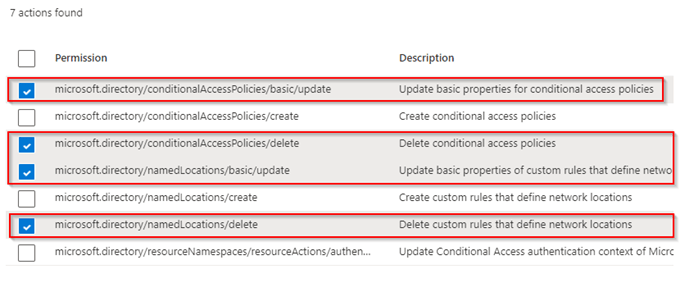
As you can see the permissions are now protected with an ‘Authentication Context’, be aware that a permission can only be tagged with one authentication context at the same time.
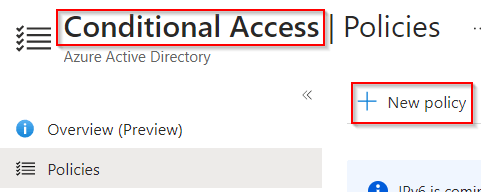
Now all the configurations are in place, let’s create a new Conditional Access Policy. For that go to ‘Protect & Secure’ on the ‘Entra Portal’ and hit ‘Conditional Access’ and select ‘Policies’.
In the Conditional Access policy give the policy a name, e.g. CA-DevComp-For-Protected-Actions, in the users first select a ‘test account’ but eventually move to ‘All users’ and make sure your break the glass account is excluded. Within Cloud Apps or Actions, select the ‘Authentication Context’ with the name ‘High-Impact permissions’. Eventually apply some additional conditions (in my example I’ve selected ‘Any Device’, ‘Any Location’ & ‘Browser and Mobile apps and desktop clients’). At last, I’ve selected a grant control, in my example ‘Require Complaint Device’.

The above policy will make sure that if you are going to change a Conditional Access Policy or Named Location and you do have the permissions to do this you must use a compliant device to make these changes. If you however want to create a Conditional Access Policy or named location this can be done without the use of a compliant device.
You can of course choose other grant controls as well, e.g. if you want to make updates or delete policies you need to use phishing resistant MFA via an Authentication Strength or need to use a Hybrid Azure AD Joined device.
Once the configuration of the policy is read, don’t forget to hit the ‘On’ switch at ‘Enable policy’ and hit ‘Create’.

Now the preparation and configurations have been finished let’s look at the experience and the logging.
Step 3: Administrator experience and logging
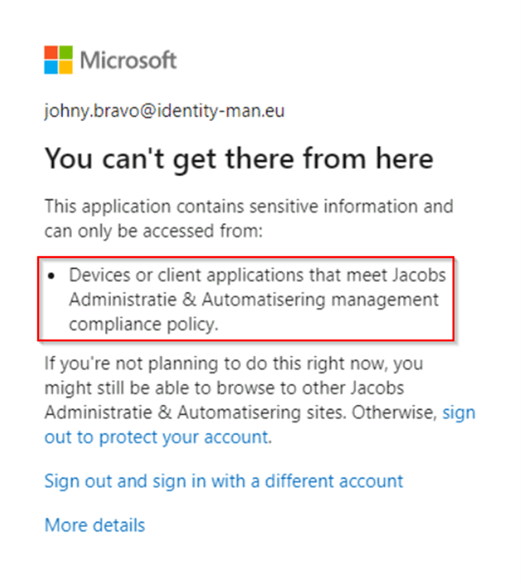
Now let’s test the behaviour from the user we included in the rule and has the ‘Conditional Access Administrator’ role. In my case that’s johny.bravo@identity-man.eu.

Now let’s try to delete an existing Conditional Access Policy.

And as you can see, I’m not allowed to as I’m not using a complaint device (my current device is hybrid and has signed on to Edge, but simply isn’t managed by Intune and therefore not considered as compliant).
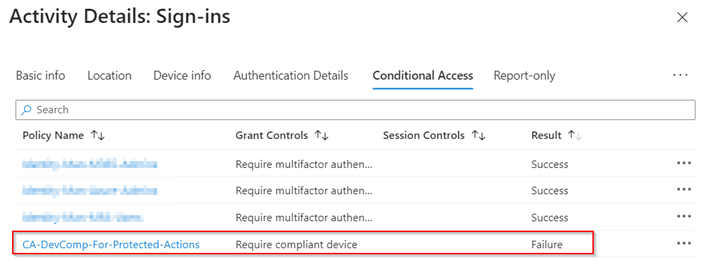
This is also logged within the sign-in logs as a ‘Conditional Access Failure’, as you can see in the image below.
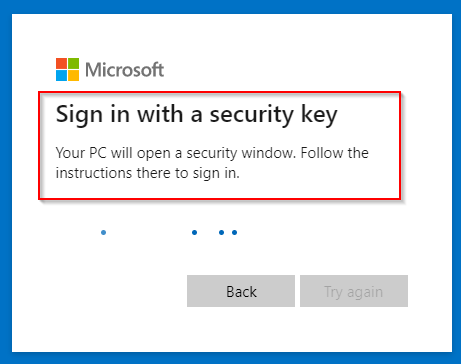
Now if we weren’t using the device compliance as grant control within conditionals access but for example the ‘Authentication Strength’ called ‘Phishing resistant MFA’ we wouldn’t be blocked, but the system will instantly challenge you for a ‘Phishing resistant MFA’ method configured within the account you’re using as you can see below.
If we wouldn’t do this via the Entra Portal, but for instance try to delete a Conditional Access policy via Microsoft Graph Explorer the same behaviour is applied.
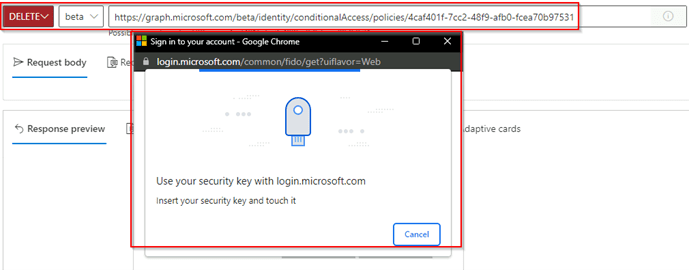
All the above simply means that by using ‘Authentication Context’, ‘Protected Actions’ & ‘Conditional Access’ we can ask the administrator to do ‘Step-up authentication’ or to execute specific actions from a particular device (which could be a Privileged Access Workstation) or with a specific method (which could be Phishing resistant MFA).
Conclusion
The new ‘Protected Actions’ in combination with the ‘Conditional Access Authentication Context’ feature is a great addition to make sure the environment is protected correctly and not everyone who has the permission is able to change ‘Conditional Access Policies’ from everywhere or any second factor method.
If you aren’t requiring all your admin accounts to use ‘Phishing Resistant MFA’ already it’s time to implement this feature and do require this for managing Conditional Access and Named locations. Or if you have already implemented ‘Phishing resistant MFA’ for your admin accounts take your zero-trust to the next level whereby you need to execute these actions from a privileged access workstation which is managed by Intune and compliant.
Let’s hope Microsoft will extended the list with permissions available for ‘Protected Actions’ soon, especially tenant settings which would affect all users are important in my opinion. This whereby you can think of the new ‘Authentication Methods’ or making changes to ‘Authentication Strengths’.
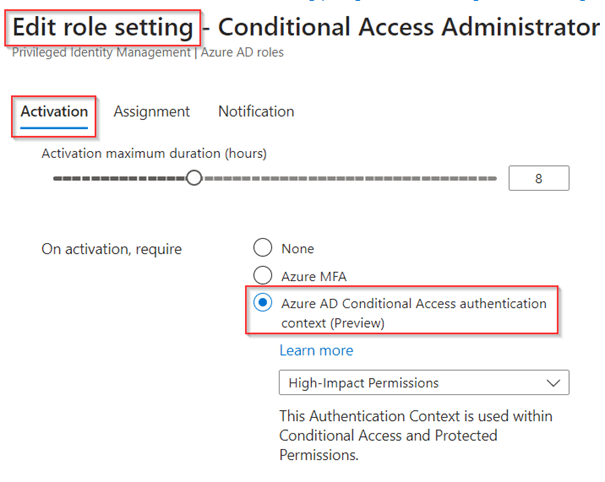
And at last, please be aware that you can use the same ‘Authentication Context’ feature as well directly within Privileged Identity Management for the activation of the role. With that we can restrict the role activation as well (but more about that in future blogs).
I hoped you enjoyed reading this blog about the new ‘Protected Actions in Conditional Access’ feature, let me know what you think about it and which kind of permissions you want to be able to use within ‘Protected Actions’! As always stay tuned for more identity blogs coming soon! 🙂

hey, thanks for the Article.
Regarding this: “The Azure/ Azure AD PowerShell module is not supported and sign-in will fail when a Protected Action is applied.”
I can still sign-in via the listed modules, but I cannot change the CA rule. Is this correct or am I missing something? I do not want to activate it and break all existing scripts that are not transfered to graph yet…
LikeLike
Hi There,
The connection will fail once the authentication context is triggered, so for instance if you would only hit the authentication context on edit mode and you don’t edit via the Azure AD PowerShell module you’re good. If you however are going to make changes via the Azure AD PowerShell module you will hit the Authentication Context and with that you simply receive an error message.
Hope that answers your question.
LikeLike