A warm welcome to my next blog in the passwordless series and yes, it’s finally about a new method and not just one, it’s all about passkeys in Microsoft Entra! Last year Apple and Google introduced passkeys in their platform, so it was just a matter of time for Microsoft to adopt the technology and that day is now here. Before we dive into how to setup and configuration, let’s first start with some additional details.
Microsoft Entra today supports device bound passkeys, in simple words the private key stays on the device itself and can’t be synced, whereby the public key is stored in the cloud (in this case Microsoft Entra). For Microsoft Entra the Passkey can therefore be saved to only the Authenticator App today. This concept is not new as a FIDO2 Security key is nothing more than a passkey only in a different physical presence, so it’s new technology but conceptually the same.
The main advantage? It’s phishing resistant, just as with FIDO2 Security keys, a passkey can’t be phished! So, in essence we finally have a way to make our Authenticator app phishing resistant, and above all it’s passwordless.

With that it’s just time before everybody is going to love device-bound passkeys, so with that let’s quickly go over some requirements and limitations.
Requirements:
- iOS version 17, as passkeys have been released for use by Apple in iOS version 17.
- Android vesion 14, as passkeys have been releases for use by google in Android version 14.
- Latest version of the Authenticator App installed (Android 6.2404.2229 or iOS 6.8.7) with ‘Usage data’ enabled within settings.
- For cross-device sign-in both devices should have Bluetooth enabled (Mobile Phone and sign-in device).
Limitations
- Backup of passkeys in the Authenticator App, device bound passskeys live sololey on one single device.
- Only one additional password manager can be used on iOS next to the iCloud Keychain (which is ridiculous).
- Synced passkeys are not supported today, let’s hope that in the near future synced passkeys become available as well.
- Although Windows Hello can be used to store passkeys, it’s today not supported in combination with Microsoft Entra Passkeys.
- Passkeys registered via cross-device registration are listed separately within the Authenticator App.
- There is no allow or deny difference between Passkeys in the Authenticator app vs Passkeys on Security keys. I.e. a user enabled for Passkeys can register a security key but also a passkey on the authenticator app (if allowed in the AAGuid configuration).
Now we know what passkeys are, we know the requirements and limitations. Let’s dive into enabling, registering, and using Microsoft Entra Passkeys in your environment and get you kick started.
Enabling Microsoft Entra Passkeys in your environment
Step 1 – Preparing the Entra Passkey configuration
Now we know what a passkey is and why we should all use one, let’s look at how we can enable one in your environment. As mentioned today only device bound passkeys are available which can be stored in the Authenticator App. For that go to the Microsoft Entra Admin portal, hit ‘Protection’, select ‘Authentication Methods’, hit ‘Policies’ and select ‘Passkeys (FIDO2)’.

Go to the ‘Configure’ tab, make sure that ‘Allow self-service set up’ is set to ‘Yes’, ‘Enforce Attestation’ is set to ‘No’. Today attestation has to be turned off as this isn’t supported with device bound passkeys, for that reason I would strongly recommend you using key restrictions as well and only allow particular passkeys in your environment. For the Authenticator App the AAGuids are listed below. To gather other AAGuids which are for instance used on FIDO2 Security (pass)keys, you can use my other blog or the blog of Michel van Vliet to determine which AAGuids needs to be configured here.
| Friendly Name | AAGuid |
| iOS Authenticator App | 90a3ccdf-635c-4729-a248-9b709135078f |
| Android Authenticator App | de1e552d-db1d-4423-a619-566b625cdc84 |
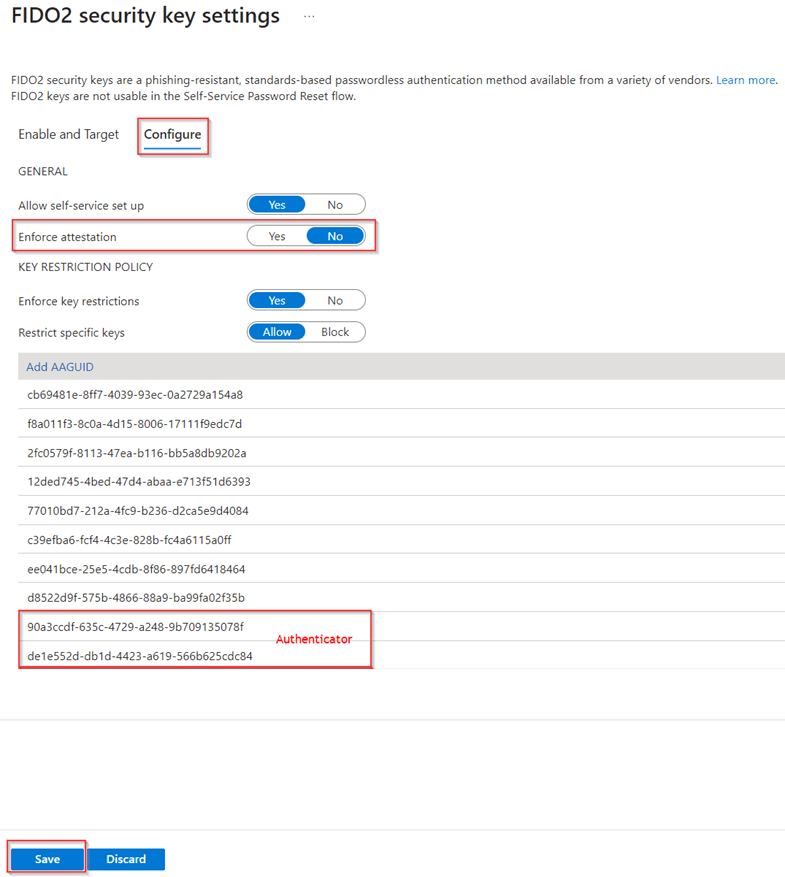
Once you’re ready and made sure that the policy is targeted to the right group (or preferably all users) as well, hit ‘Save’.
Important to know is that this setting only affects the registration of the passkeys, passkeys (including FIDO2 Security Keys) which were already registered in your environment will stay working. If you want to restrict the usage however you can configure authentication strengths in Microsoft Entra to only allow the usage of specific Passkeys. For that go to the Microsoft Entra Admin Portal, hit ‘Protection’, select ‘Conditional Access’ and hit ‘Authentication Strengths’. In here you can create a new or edit an existing ‘Authentication Strength’. For this example, let’s create a new ‘Authentication Strength’ called ‘Passkeys’, make sure that ‘Passkeys (FIDO2)’ is selected and hit ‘Advanced Options’.

Within the ‘Advanced Options’ make sure the AAGuids you want to use are added to the Authentication Strength, in my case I added both of them and hit ‘Save’.

Once ready hit ‘Next’ review what’s created (as you can see here the AAGuids are actually translated to regular text strings, and you can hit ‘Create’ once all is correct.
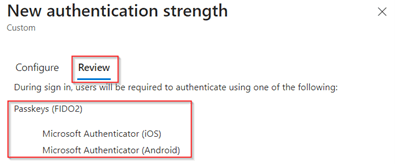
After the Authentication Strength is created, we can see it’s available and ready for use with Conditional Access Policies as well.

Your environment is now fully ready for the use of Passkeys, so let’s enable an account with a passkey!
Step 2 – Enabling passkeys for your user account
Now we have made sure you’ve enabled passkeys for your environment, let’s enable your user account with a passkey! For that there are two experiences, the first one is a registration on the same device (from within the authenticator app), the second option is a registration cross device. As the registration from the Authenticator App is the most convenient experience, let’s look at that option first!
Option 1 – Registration from the authenticator app
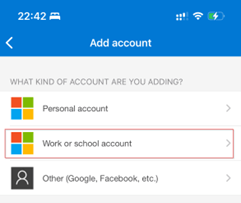
Open the Microsoft Authenticator App and hit the ‘+’ sign.

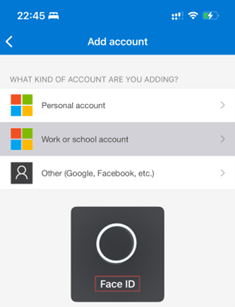
Select ‘Work or School account’.
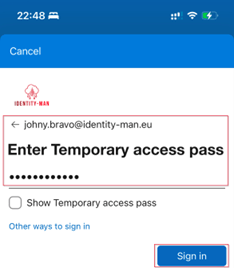
Next, hit ‘Sign In’.

Now sign-in with the account you want to enroll a passkey for and is allowed within the Authentication Methods policy. In this case you must have Multi-factor authentication already setup on this account, or you need to have a temporary access pass. In our example we use a Temporary Access Pass and once ready ‘Sign In’.
Now biometric or PIN authentication is required to finalize and save the passkey configuration within the Microsoft Authenticator App.
Once provisioned the user account is fully enabled with a Passkey, Push Notifications, Phone Sign-in and OTP codes within the Authenticator App.
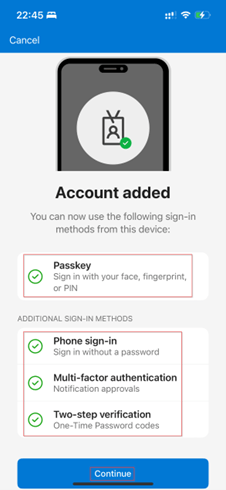
NOTE: The above is the case when the configuration on the Microsoft Authenticator authentication method is set to ‘Any’, so the above experience can easily be altered by editing that authentication method.
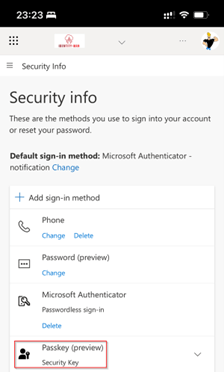
If we now open the account within the Authenticator App we can see that it has been enabled with a ‘Passkey’.
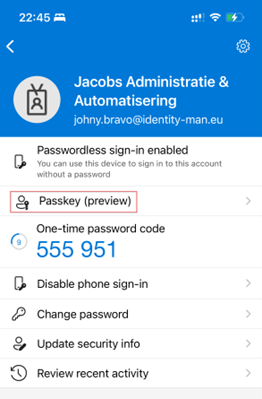
The Passkey is now ready for use by the end user.
Option 2 – Registration cross-device
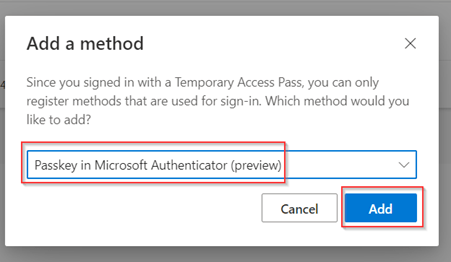
The second option is to register passkeys using the cross-device experience. For that open a web browser and go to My Security Info and hit ‘+ Add sign-in method’.

In the dropdown menu make sure that ‘Passkey in Microsoft Authenticator’ is selected, hit ‘Add’ and hit ‘Next’.
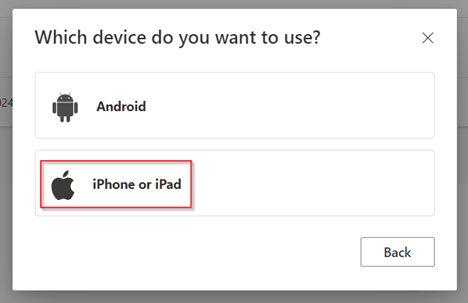
In the next screen select which device you want to use to store the passkey, in my example I’ve used ‘iPhone or iPad’.
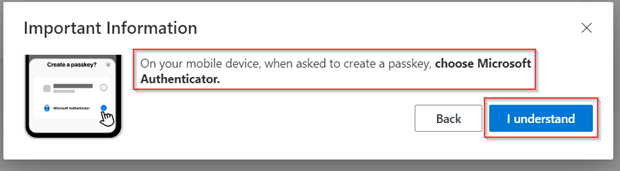
Now an important screen is shown, as it tells you exactly which steps you need to take on your device to enable passkey support for Microsoft Authenticator on your device.

So, for that go to ‘Settings’ on your iOS device, select ‘Password Options’ and enable ‘AutoFill Passwords and Passkeys’ and enable ‘Authenticator’, like below.

As you can see, I’ve turned on Passkeys for ‘Authenticator’ and for my ‘iCloud Keychain’. With that it’s important to note that the iCloud keychain can always be turned on or off, however only one additional 3rd party application (like authenticator) can be selected here (this limitation is an Apple limitation rather than a technical limitation and won’t be there when using Android).
NOTE: Please help us reporting this to Apple by sharing feedback. Feedback – iPhone – Apple, for that you can use the sample text below (created by Fabian Bader):
Dear Apple,
Please allow an unlimited number or at least three passkey providers in the next minor iOS release to comply with the Digital Markets Act, and to make your users happy.
Thank you in advance.
Once your settings are configured correctly within iOS hit ‘Continue’, ‘Next’ and ‘I understand’.
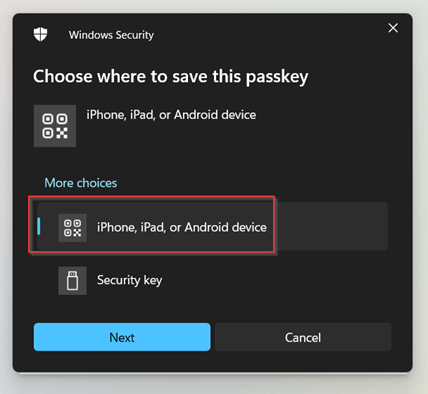
In the next screen select ‘iPhone, iPad or Android device’ and hit ‘Next’.
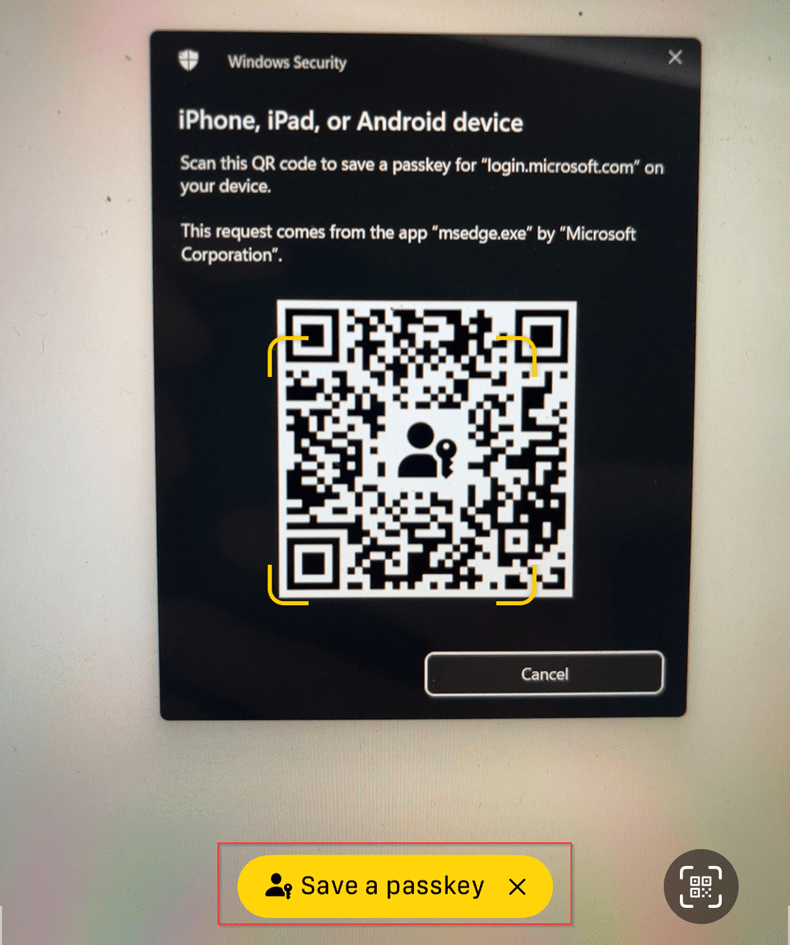
We can now scan the QR code with the iPhone and hit ‘Save a passkey’.
Once selected, make sure you select to store the Passkey in the ‘Authenticator App’ and hit ‘Continue’.

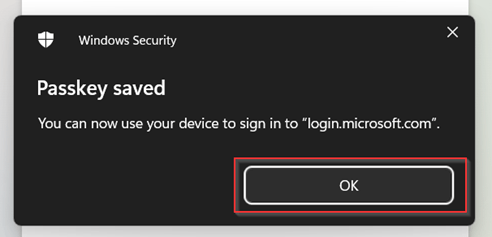
The authenticator app will register the passkey and windows will report as well that the Passkey has been successfully saved.
The only thing left to do is to give it a friendly name, like ‘Passkey on iPhone van Pim’ and hit ‘Done’.
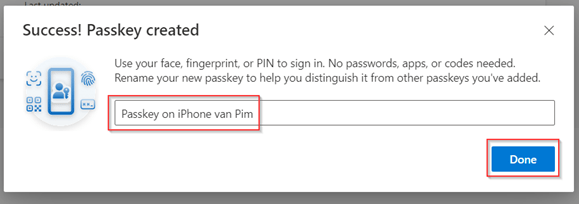
Now as you can see the passkey has been successfully added to my account and it’s ready for use.

The difference however compared to the authenticator app experience is that the passkey will be stored separately next to the ‘regular’ Multi-factor authentication registration.

Now we walked through both of the registration experiences, let’s have a look at how to sign-in with a passkey on Microsoft Entra!
Step 3 – Sign-in with passkeys to your user account
Option 1: Same device sign-in experience
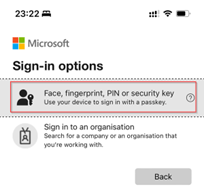
Let’s first look at the sign-in experience from my iPhone itself. For that I’ve opened a browser and went to the Office Portal, and I hit ‘Sign-in options’.

In here we select ‘Face, fingerprint, PIN or security key’.
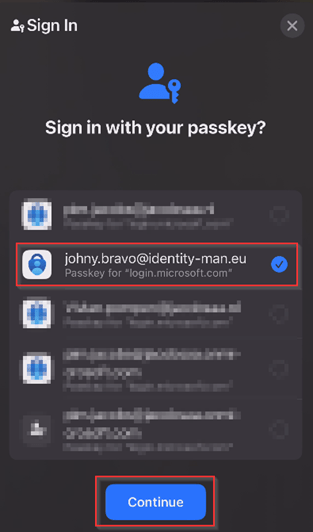
Next, we select the passkey which we want to use to sign-in with, and are stored within the Microsoft Authenticator, and we hit ‘Continue’. As you can see it’s extremely easy to select a different account as well in case you’ve got multiple accounts you work with.

After a successful biometric or PIN verification I’m signed in, it’s super easy!
Now let’s have a look at the cross-device sign-in experience.
Option 2: Cross device sign-in experience
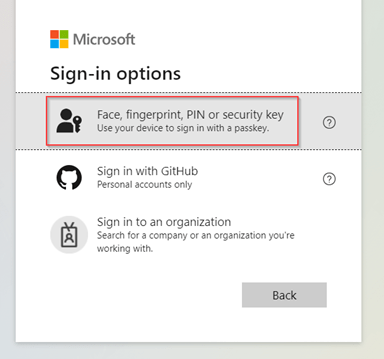
With the cross-device experience we open a web browser on a laptop and go to the Office Portal and hit ‘Sign-in options’.

Next, we select ‘Face, fingerprint, PIN or security key’.
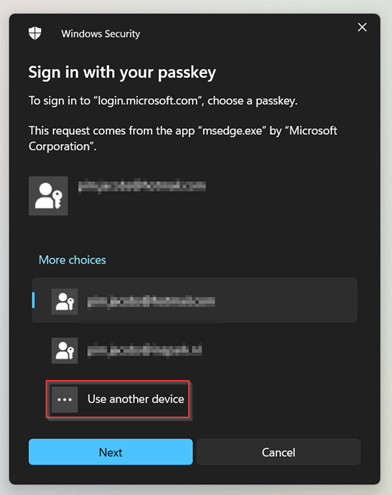
In the next prompt we select ‘Use another device’ as the passkey is stored on the iPhone.
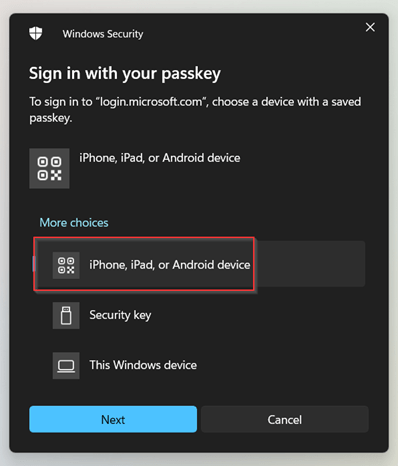
Next, we select ‘iPhone, iPad or Android device’ and hit ‘Next’.
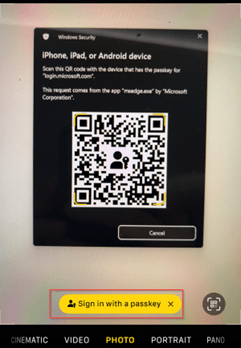
Now the QR code is shown on the screen, scan the QR with the camera on your phone and select ‘Sign in with a passkey’.
Now a Bluetooth connection is setup between your device and mobile phone and once connected, you’re able to select which passkey you want to present and hit ‘Continue’. Again, this would require you to present some biometric authentication or type in your PIN on your mobile device.
And that’s it I’m now signed in with my passkey with the cross device experience!

Now we are able to successfully login, let’s look at the details on the backend.
Step 4 – Looking at the logs and adoption rate
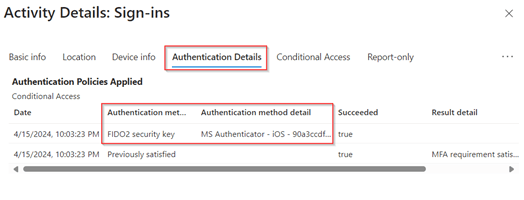
Now users can successfully register and use their keys, let’s briefly look at the sign-in logs. In these logs we can see under ‘Authentication Details’ that a Passkey (FIDO2) is used and in the ‘Authentication method detail’ we can see that it’s coming from the Microsoft Authenticator App on iOS.
Also, we can check the adoption rate under the ‘Authentication Methods’ blade by going to the ‘Activity’ section. In here we can exactly see how much Passkeys are registered within the Authenticator App within your environment.

If we even want to take a deeper look, we can drill down on this detail by going to the ‘user registration details’ and filter on the method ‘Passkey (Microsoft Authenticator)’.

Now we’ve seen the sign-in logs, activity and user registration details, let’s wrap up to a conclusion!
Conclusion
Now we’ve walked through the setup how to enable passkeys within Microsoft Entra and you know how to create and use a passkey for your user account. You are ready for a broader roll-out on scale.
By using passkeys in Microsoft Entra, we are one step closer to ban phishing and clickbait from your environment, but also one step closer towards working in a passwordless world. Security is crucial in today’s world, so please take some time to correctly configure the Passkey Authentication method in your environment, make sure key restrictions are in place (as attestation needs to be turned off) and communicate the instructions to your end users for solid adoption.
With that (I hope) I’ve challenged you to implement Microsoft Entra Passkeys in your environment and start moving to a phishing resistant sign-in experience.
I again hope you enjoined reading this blog and are now ready to continue your passwordless journey with the use of Passkeys in Microsoft Entra. Stay tuned for more blogs coming out soon in the passwordless series, let’s hope for new Passkeys functionality, so stay tuned! :-).
Other related password-less blogs:
- Introduction to a password-less era
- Password-less 1 of 5: Going password-less with phone sign-in
- Password-less 2 of 5: Going password-less with Windows Hello for Business
- Password-less 3 of 5: Going password-less with Windows Hello for Business Hybrid
- Password-less 4 of 5: Going password-less with FIDO2 Security Keys Part 1
- Password-less 4 of 5: Going password-less with FIDO2 Security Keys Part 2
- Password-less 5 of 5: Expanding password-less to Azure AD Applications Part 1
- Password-less 5 of 5: Expanding password-less to Azure AD Applications Part 2
- Password-less 5 of 5: Expanding password-less to Azure AD Applications Part 3
- Password-less continued: Upgrading your password-less experience with Windows Hello for Business Hybrid cloud-trust
- Password-less continued: Using the Passwordless Phone Sign-in experience for multiple accounts on iOS!
- Password-less continued: Using a Temporary Access Pass for Bootstrapping your Passwordless Journey
- Password-less continued: Using Authentication Strengths to require Passwordless methods in your environment
- Password-less continued: Start hiding the password option from the login screen in Windows 11
- Password-less continued: Entra device bound passkeys are here, all you need to know!

Great article! Is there any functional difference between 1st and 2nd registration experience in terms of usage after enrollment? If not I’m not seeing the advantage to the additional complexity, except perhaps not needing mfa to enroll because of a cached token.
LikeLike