A warm welcome to my next blog in the Identity Governance series which will focus on the identity Lifecycle management for your guests!
Each organization is dealing with guest users today in their Azure AD tenant. Some of the guest users are maybe invited just yet, some of them are maybe months old and some of them are years old. Whereby some guest users are still active, some of them are only using it twice a year and some of them have already left the company whereby the account of the user was removed in their home tenant, but never the guest user in your tenant.
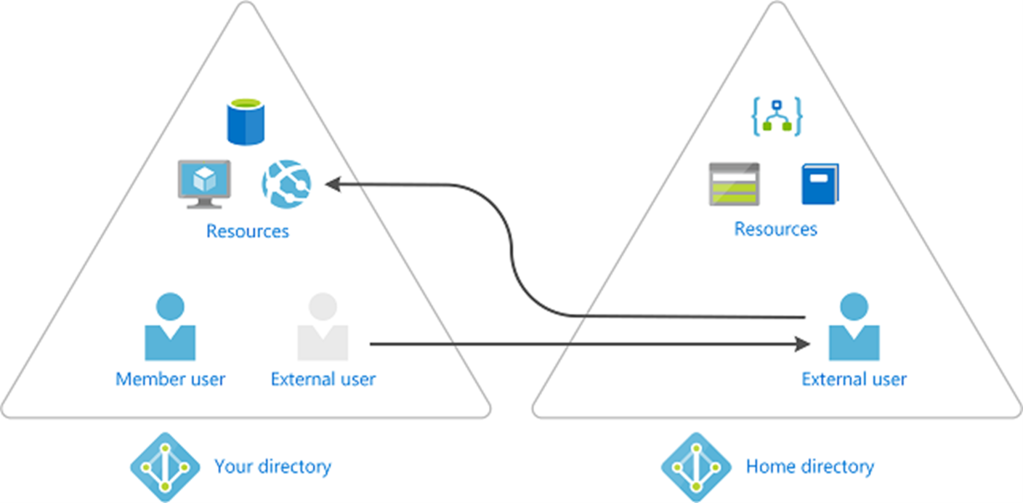
Whereby it’s super easy to get guest users in your tenant, as people can invite from MS Teams or share documents in OneDrive / SharePoint. It’s on the other hand quite hard to get them cleaned up correctly, there isn’t really an automated process for that in place, or is there?
Well to get an answer to that question I will show you in the upcoming three blogs in this series, of which this is the first one, the latter by applying identity lifecycle management around guests within your tenant. This whereby we are going to use the Azure AD Identity Governance features called Access Packages and Access Reviews and will use a PowerShell script as well within Azure Automation. This as there are several ways to achieve your goal(s) and depending on the use case(s) you have you need to determine what the right solution is for your environment.
I can hear you thinking, “What are those three options in short?”, therefore I’ve summarized them in short for you below:
- Let the lifecycle of guest accounts be managed via Identity Governance – Whereby an access package will manage the provisioning and deprovisioning process of the guest users.
- Use Azure Automation and scripting logic to clean-up guest accounts – Whereby a global access review will be used for your guest users and a script will be placed within Azure Automation which will disable and eventually clean-up ‘inactive’ guest users from your tenant.
- Use Access Reviews to clean-up Guest Accounts – Whereby an access review is created for guest users which can and eventually will disable and clean-up ‘inactive’ guest accounts from your tenant.
NOTE: If you’ve Azure AD Premium P2 available in your tenant and already have guests in your tenant, I highly suggest to at least use the last option as that is using native Azure AD functionality.
Now you know the three options we have available, let’s have a look at the first option ‘Let the lifecycle of guest accounts be managed via Identity Governance’ in this blog in more detail and how to get this configured and get you up and running!
OPTION 1: Let the lifecycle of guest accounts be managed via Identity Governance
As explained earlier in this blog the lifecycle of guest accounts can be managed easily via the Identity Governance process. This only if the identity is created via an Access Package and the correct settings are applied within your tenant.
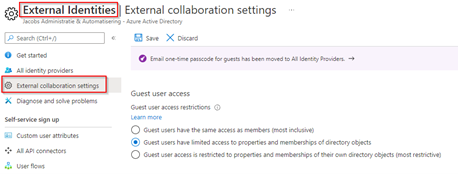
Therefore, let’s first make sure the right tenant settings are in place in your environment. For that go to Azure Active Directory and hit the ‘External Identities’ blade and go to the ‘External collaboration settings’.
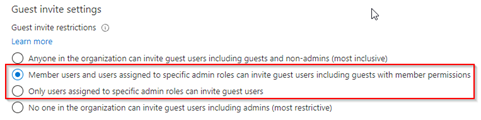
In here configure the ‘Guest invite settings’ to either ‘member users and users assigned to specific admin roles can invite guest users including guests with member permissions’ or preferably ‘Only users assigned to specific admin roles can invite guest users’. By choosing the latter you are preventing your end users from inviting guest users, meaning the guest identities are always provisioned based on an access package or an administrator / user with (at least) the guest inviter role. This can help to get your guest accounts within control!
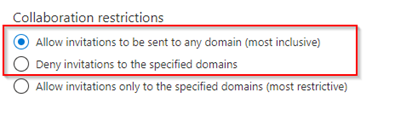
Once configured the last step within the blade is to make sure that users can be invited within your tenant by configuring the ‘Collaboration restrictions’. This is important as once these settings are restricted and users are invited but their domain is blocked the process will fail. Therefore, either set the value to ‘Allow invitations to be sent to any domain (most inclusive)’ or configure ‘Deny invitations to specified domains’ and specify these domains. In my opinion both would work fine if a deny is created with the right reasons.
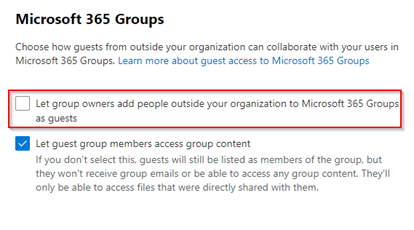
Depending on the guest invite settings mentioned above there is also an option to control if group owners of Microsoft 365 Groups are allowed to add guests. This can become quite helpful if you want to restrict guest users to use the access package flow (as described below), whereby the lifecycle is managed automatically. To configure this setting, please go to the Microsoft 365 admin portal, click on ‘Settings’ hit ‘Org Settings’ search for ‘Microsoft 365 Groups’ hit the settings and uncheck the box for ‘Let group owners add people outside your organization to Microsoft 365 Groups as guests’.
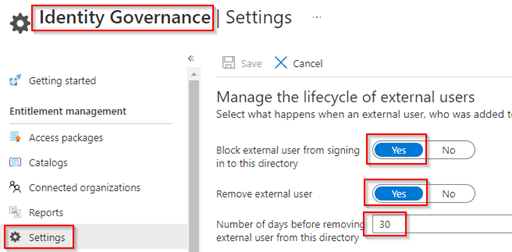
Now the tenant settings of Azure Active Directory are configured, let’s go to the Identity Governance blade in ‘Azure Active Directory’ and within the Identity Governance blade hit ‘Settings’. In here it’s important to make sure the following settings are configured to your needs:
- Block external user from signing in to this directory – set to ‘Yes’.
- Remove external user – set to ‘Yes’.
- Number of days before removing external user from this directory – set to ‘30’ days (or changed according to your needs).
By applying the above configuration, you determine what happens when a guest user was provisioned in your tenant via an access package and looses his last access package assignment within the tenant. The process therefore simply provides you with an automated lifecycle process for guest accounts.
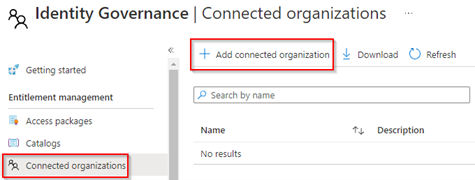
Now these settings have been configured, let’s have a look at the ‘Connected Organizations’ settings. A connected organization can be quite helpful in the scenario when you have suppliers or companies which you work with on a regular base. Especially as you can limit down the access packages they see within your environment based the connected organization. Therefore, let’s add a connected organization by hitting ‘Add connected organization’.
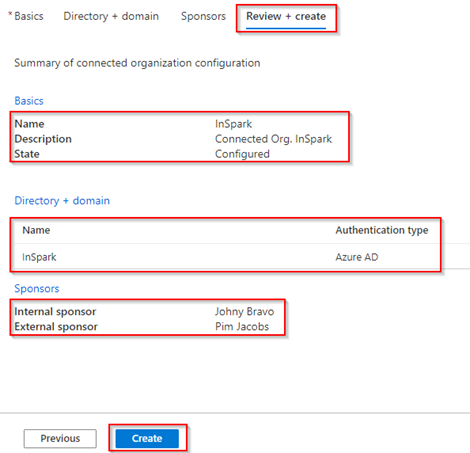
Within the ‘Basics’ settings give the connected organization a Friendly Name, Description and set the state to ‘Configured’.
NOTE: Setting the state to ‘Proposed’ is doing the pre-configuration but not making it active and usable yet.

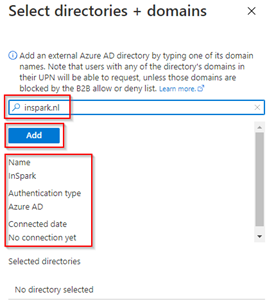
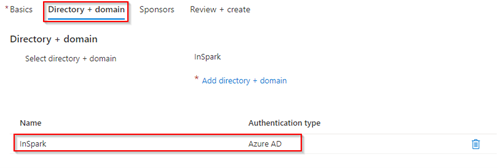
Within the ‘Directory + domain’ settings hit ‘Add directory + domain’.
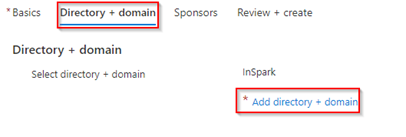
Next type the domain name of the connected organization (i.e. inspark.nl) and hit ‘Add’. As you can see it’s retrieving authentication information from the tenant, and we can see it’s not connected yet. Important to know as well is that you only need to do this once per tenant, it’s a relation to a tenant not to a specific domain.
After you’ve hit add, verify the domain is in the selected directories and hit ‘Select’.
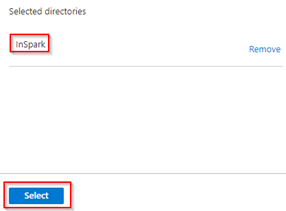
The domain has now been added to the connected organization settings.
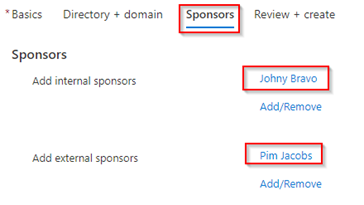
Now within the ‘Sponsors’ settings, make sure you have selected an internal and external sponsor. These sponsors can later be selected as approvers within an access package so the users you select here need to be chosen wisely. In most cases an internal sponsor is an existing user within your environment which is already in contact with the connected organization and ‘knows’ the organization. The external sponsor can still be someone within your environment but it most likely would be a user from the connected organization who already has a guest user within your tenant.
Once the configuration is ready, let’s review all the sections and hit ‘Create’ when ready.
Now we have configured the Connected organization it’s time to configure an access package so we can let people of outside request access to resources whereby the account is automatically provisioned and created and in scope for the ‘block’ and ‘cleanup’ settings we configured earlier.
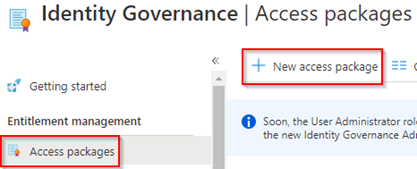
For that let’s go to the ‘Access Package’ blade within Identity Governance and hit ‘+ New access package’.
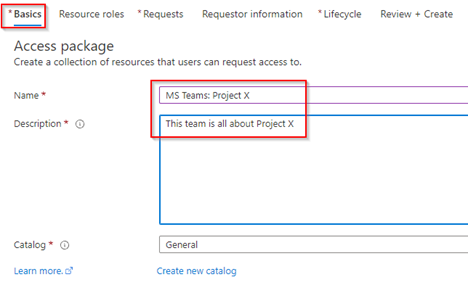
Within the ‘Basics’ settings of the access package creation please fill in the ‘Name’ and ‘Description’.
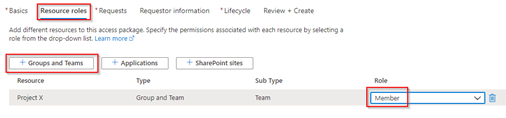
Within the ‘Resource roles’ settings, define to which resources the user will get access once he becomes a member of the access package. In this example I’ve used a MS Teams environment with the name ‘Project X’ whereby the user becomes a member of the team (not an owner, but that’s an option as well as you can see).
Once the resource roles are configured the next step is to configure the ‘Requests’ whereby you have 3 options:
- For users in your directory – This will make the access package available for users who are already in your directory.
- For users not in your directory – This will make the access package available for users who are not yet a member of your directory (i.e. users from connected organizations).
- None – Which requires a manual administrative assignment to a package.

In this example I’ve used ‘For users not in your directory’ and I’ve scoped this to ‘Specific connected organizations’ whereby I did select ‘InSpark’ as the connected organization. By doing this I’m making sure that users from the inspark.nl domain can request access to the Project X MS Teams environment.

Once the connected organization is configured on the access package let’s make sure the ‘Approval’ settings are configured. In here we can see that I’m able to select the ‘Internal Sponsor’, which I’m using in this example, and which is referring to the ‘Internal Sponsor’ defined within the connected organization settings. Once the approver is selected configure a ‘Fallback’, ‘Decision time’, ‘Approver justification’ and eventually an ‘Alternate approver’ as well.
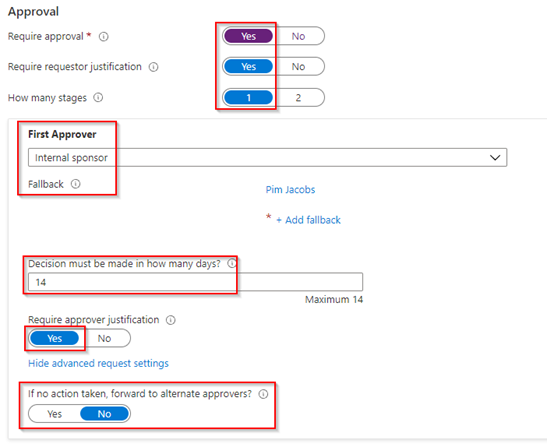
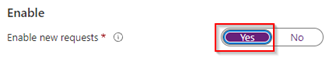
Once ready make sure set the ‘Enable’ state is set to ‘Yes’.
NOTE: if you forget this, people won’t be able to request this access package.
Once the Requests settings are configured let’s quickly configure the ‘Requestor information’ settings in which we are going to provide the user requesting the package with an ‘extra’ challenge whereby we question the role of the user in ‘Project X’ and the user is able to answer with a short text reply.

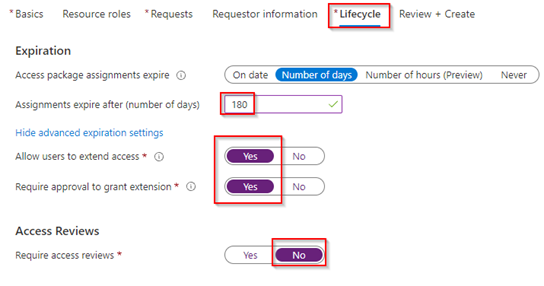
Once done let’s proceed to the last configuration step, which is ‘Lifecycle’ settings. Whereby we are able to configure the ‘Expiration’ and ‘Access Reviews’ settings. Here I would advise to not apply them both if not required, this as an expiration (more or less) is doing the same as an access review. In this example I’ve therefore only used the ‘Expiration’ settings, configured it to 180 days, whereby people can extend their access with again an approval flow. This means that each 180 days access will be removed, unless someone approves again, therefore an access review becomes obsolete in this scenario.
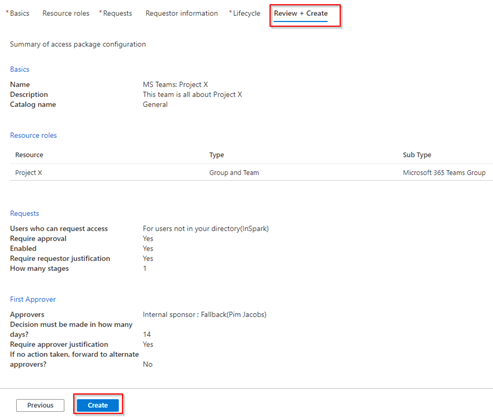
Now review the settings and hit ‘Create’ once all is configured correctly.
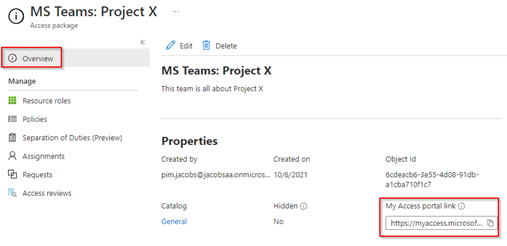
Once the access package is created, on the ‘Overview’ page we can easily retrieve the URL of the access package again which you can distribute. This can be found beneath the ‘My Access portal link’. Another option you can provide to let users request access, without a complex URL distribution, is by going to the URL https://myaccess.microsoft.com/tenantname.onmicrosoft.com, or in my example: https://myaccess.microsoft.com/jacobsaa.onmicrosoft.com.
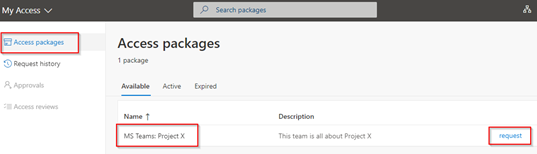
If the (to be) guest user now goes to the Access Package URL directly (provided via i.e. email) or to the My Access tenant URL (https://myaccess.microsoft.com/tenantname.onmicrosoft.com) mentioned above the user will end up on the My Access page below (still without having a guest account). In this example I have used my inspark.nl work account which is a member of the connect organization and therefore this account is able to see this access package, like we configured in previous steps. At this point my inspark.nl user account still doesn’t exist in my tenant as a guest user, so let’s try out the provisioning process with Identity Governance by hitting ‘Request’ on the right of the created Access package.
NOTE: When user goes to the MyAccess portal without the use of the Access Package URL or the URL containing the tenant name the users will unfortunately not be able to see the packages.
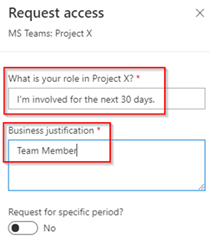
As configured within the Access Package I’m required to fill in my role within Project X and I need to enter a business justification.
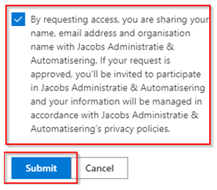
Next, make sure to select the checkbox to share information with the destination tenant so they have enough information to provision the guest account and once ready, hit ‘Submit’.
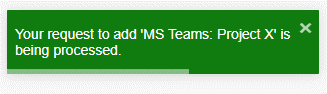
Once submitted I’m seeing the message that my request for access with my inspark.nl account to Project X is being processed.
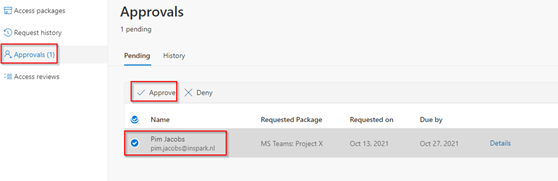
Now the request for access to this access package is submitted the approval flows are triggered, in this example the approval goes to the internal sponsor as configured within the access package. In this example it’s johny.bravo@identity-man.eu. Therefore, if Johny goes to https://myaccess.microsoft.com and hits ‘Approvals’ on the left side of the screen, he is be able to see the request, mark the checkbox and is able to hit ‘Approve’.
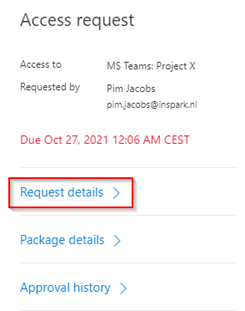
On the right side of the screen a new window will open whereby Johny is than able to see the ‘Request details’ which will show the information I entered into the text boxes during the request.
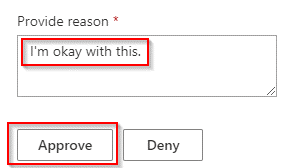
On the bottom of the screen I’m able to ‘Provide a reason’ for the approval (which is mandatory), and afterwards we can hit ‘Approve’.
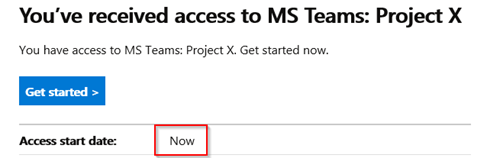
Once all flows are finished, I will receive a message on my InSpark account stating I’ve received access to the MS Teams environment of Project X.
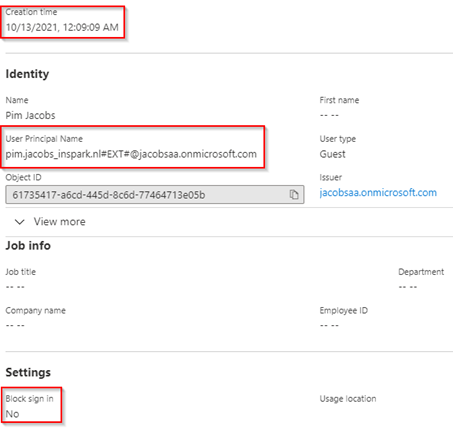
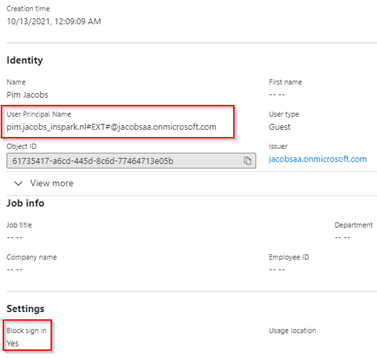
As you can see the ‘Creation time’ of the Guest Account is straight after I did hit approve, whereby the Azure AD, via the Access Package process, does provision my account and makes my account a member of the MS Teams environment of Project X as well.
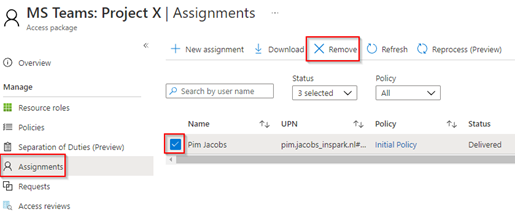
A we configured the global tenant settings within Identity Governance to block and remove the guest account (after it loses the last access package assignment but ONLY when it was created via an access package request). Let’s see what happens how that works out in practice and let’s speed up the testing a bit. For that go to the Access Package of Project X we just created within the Azure Active Directory under Identity Governance, hit ‘Assignments’, select the user and hit ‘Remove’.
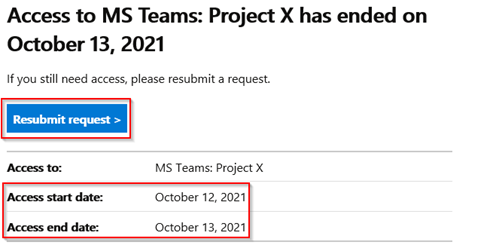
At that point the user will be removed from the Access Package and will be informed by email as shown below (normally this process is of course handled automatically via Expiration settings or Access Reviews as configured within the access package).
Now as the guest user loses hist last access package assignment and the guest user was created as well via an access package flow the user will be blocked from signing in automatically as you can see below, block sign-in has been set to ‘Yes’.
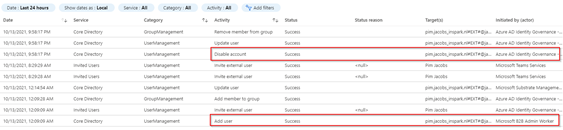
In my example as the tenant settings are set to 30 days, the guest user will be deleted 30 days after it has been disabled by this process. You can easily determine when this is happening by checking the audit logs under the guest user account. In here you can see the user has been added to the Azure AD via the Microsoft B2B Admin Worker flow and has been disabled by the Azure AD Identity Governance – User Management flow.
The above process by using an Access Package does contain lots of steps compared to a simple invite from Microsoft Teams by an end user. However, it handles all steps which are important when talking about Identity Lifecycle management for Guests user accounts. Especially when the right tenant settings are in place, as described at the start of this option, it will improve the security posture of your guest accounts!
Conclusion
After you’ve followed the above steps, you have now implemented a lifecycle management solution for guest accounts via access packages only. It helps you in some scenarios but probably not all of them, it is however good to know this option is available and you can make use of it! Of course, the right balance needs to be found between keeping your end users productive and enable them to collaborate with others. Therefore, in the next two blog we will have a look at two other options we have as well for these scenarios.
I hoped you enjoyed reading this new blog within the Azure AD Identity Governance series! Stay tuned for Part 2 of this blog ‘Implementing Identity Lifecycle management for guest ’ in the upcoming weeks :-).
- An Introduction to Azure AD Identity Governance
- Identity Governance 1 of 10: Implementing a Strong Identity Foundation
- Identity Governance 2 of 10: Implementing Identity Lifecycle management for guest users – part 1
- Identity Governance 2 of 10: Implementing Identity Lifecycle management for guest users – part 2
- Identity Governance 2 of 10: Implementing Identity Lifecycle management for guest users – part 3
- Identity Governance 3 of 10: Configuring Provisioning in 3rd party apps for (guest) users
- Identity Governance 4 of 10: Implementing LifeCycle Workflows – Configure the basics
- Identity Governance 4 of 10: Implementing LifeCycle Workflows – Configure onboarding workflows
- Identity Governance 4 of 10: Implementing LifeCycle Workflows – Configure offboarding workflows
- Identity Governance 5 of 10: Using the hidden gems in Azure AD access packages, all you need to know! – Part 1
- Identity Governance 5 of 10: Using the hidden gems in Azure AD access packages, all you need to know! – Part 2
- Identity Governance 5 of 10: Using the hidden gems in Azure AD access packages, all you need to know! – Part 3
- Identity Governance 5 of 10: Using the hidden gems in Azure AD access packages, all you need to know! – Part 4
- Identity Governance 6 of 10: Using the brand new Entra Inbound Provisioning API for Identity Lifecycle Management!
- Identity Governance 7 of 10: Recertify access by using Microsoft Entra Access Reviews! – Part 1
- Identity Governance 7 of 10: Recertify access by using Microsoft Entra Access Reviews! – Part 2
- Identity Governance 8 of 10: Implementing Privileged Identity Management
- Identity Governance 9 of 10: Implementing a Terms of use
- Identity Governance 10 of 10: Review by Monitoring and reporting

Unfortunately you need an EMS E5 or P2 license to be able to configure Settings in Identity Governance. Otherwise I would have loved to configure this.
LikeLike
Correct, part two of this bog is however only partially based on P2 functionality. Hope that will help you out a bit! I will publish that one in the week of the 15th of November :-)!
LikeLike