A warm welcome to my next blog in the Identity Governance series, which is the third one about the ‘Hidden gems’ in Entra ID Governance access packages. In the first and second blog we already covered what an Access Package is, how to create one, which options there are for assignments and separation of duties, why it’s important to use them and we looked at the ‘hidden gems’ of access package catalogs.
As you may know now already, you can go nuts on access packages, so having said that I’m writing 4 blogs to walk with you through the hidden gems in access packages with great examples:
- In the first blog we looked at the hidden gems of the Access package catalogs – In which I will show you some great features which you need to enable from your catalog to make use of them within your Access Package.
- In the second blog we looked at the hidden gems of assignments in Access Packages – In which I will show you how you can dynamically assign an Access Package to end users matching specific criteria. And more important how this co-operates together with separation of duties.
- In this blog, we will look at the hidden gem of using a custom extension in Access Packages – In which I will create a single access package which, after approval of the manager, will send the user a temporary access pass to enroll for Multi-Factor Authentication or Password less methods.
- At last, we will look at the power of delegation and reporting for Access Packages – In which I will end the story around Access Packages with the options you have to delegate some management within the business to more experience IT users.
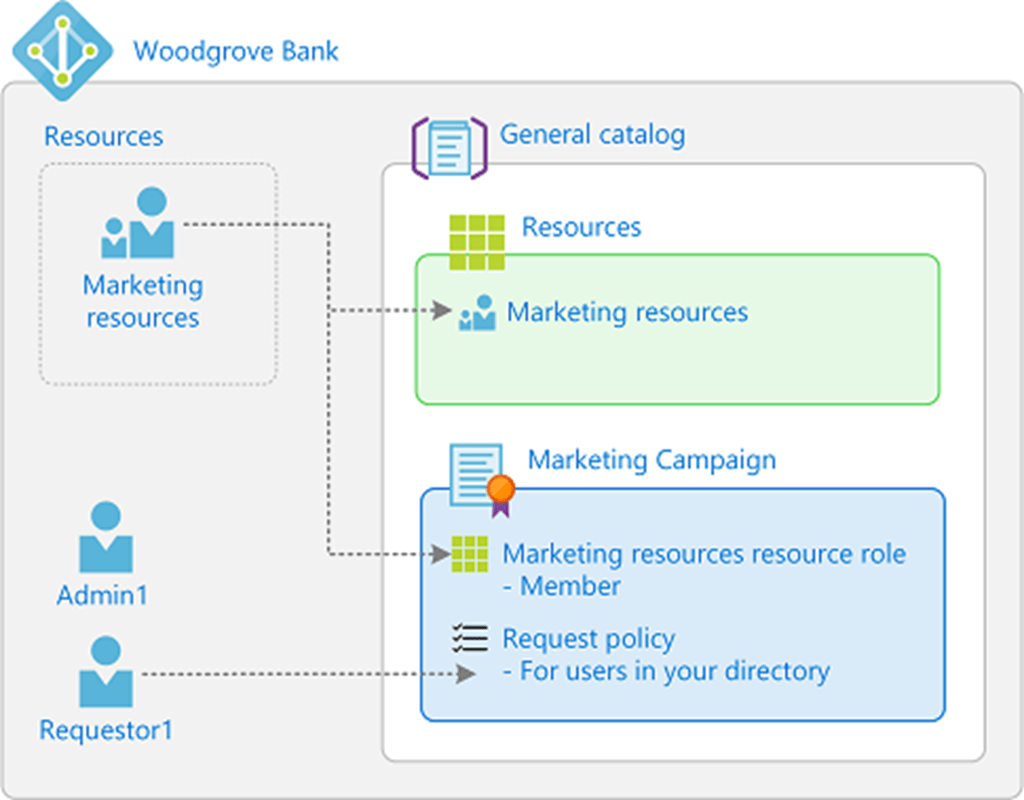
This third part of the ‘hidden gems’ in Entra ID Governance Access Packages will show you how you can use custom extensions to fulfill your custom tasks which aren’t available out-of-the-box within Access Packages. These custom extensions, which rely on the use of logic apps, can be triggered within an access package at different stages, e.g. ‘Access requested’, ‘Access granted’, ‘Access Removed’, etc. Within this blog I will show you how you can make use of these custom extensions to easily automate a custom task for you, in this case as example requesting a Temporary Access Pass.
Now, time to dive into the use of ‘Custom Extensions’ within Entra ID Governance Access Packages!
The hidden gems of using a custom extension in Access Packages
Step 1: Creating the ‘Custom Extension’ within the catalog
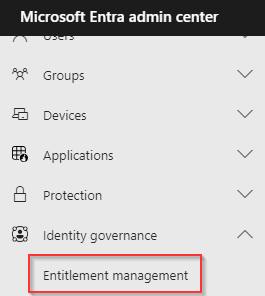
In the first step we first need to create the custom extension so we can select it from within the Access Package. For that, go to the Entra admin portal, open ‘Identity Governance’ and hit ‘Entitlement Management’.
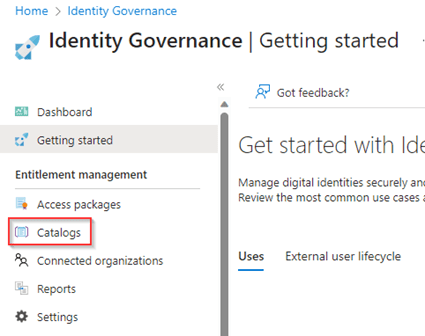
As the next step open the ‘Catalogs’ tab.
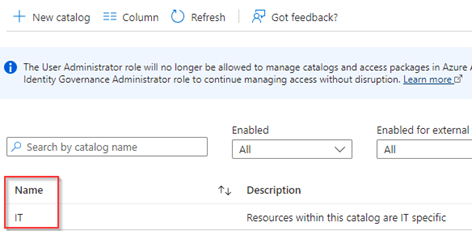
Now either create a new catalog or select an existing one. In my example I’ve used an existing catalog called ‘IT’.
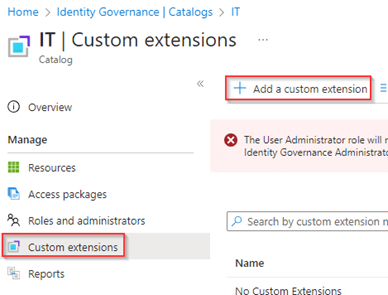
Within the catalog we see ‘Custom Extensions’, open this blade within the catalog and hit ‘+ Add a custom extension’.
Now the wizard to create a new custom extension opens, in here configure the custom extension with a name and description. My advice would be to use the same name for the custom extension as you will give the logic app so you always know there is a relation between the two. Once ready hit ‘Next’.

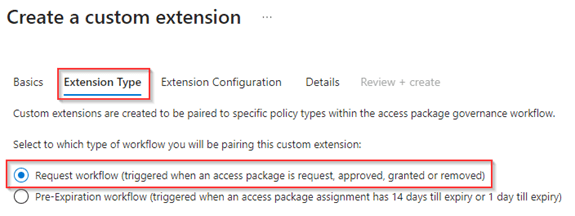
In the next step, ‘Extension Type’, we can select at which step the custom extension is triggered. As we are going to use the custom extension once access is granted to the access package I’ve selected ‘Request Workflow’. Once ready hit ‘Next’.
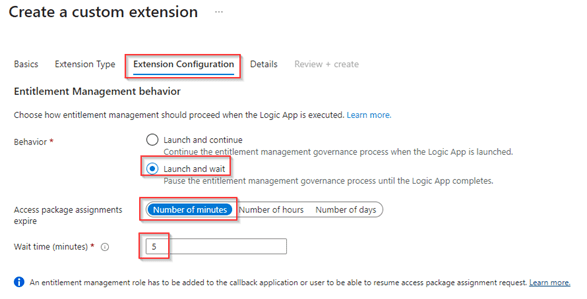
In the next pane called ‘Extension Configuration’ we can determine the behavior of the custom extension, as we want to know if things were successful, we have selected ‘Launch and wait’ and in this example for 5 minutes. There are some scenarios where this ‘wait time’ needs to be extended as the process behind the logic apps may take more time than 5 minutes to complete. Once all done, hit ‘next’.
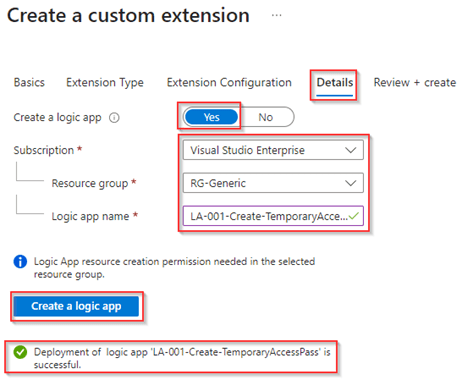
In the ‘Details’ pane at ‘Create a logic app’ hit ‘Yes’, select the ‘Subscription’, ‘Resource Group’ and provide the logic app a name. In my example I’ve used the same name for the logic app as for the custom extension as you can see. Once ready hit ‘Create a logic app’ and wait until the green check appears for a successful deployment of the logic app.
NOTE: It’s advisable to create a Logic App via this wizard as it makes sure the necessary details are provisioned into the logic app. If you manually create a logic app and select it here, you all need to configure this yourself which I wouldn’t recommend you to do (this behavior is identical to the behavior today in Lifecycle Workflows).
Once you’re ready hit ‘Next’.
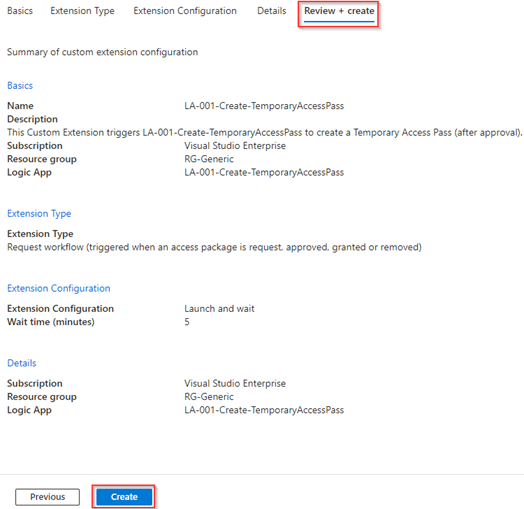
Now it’s time to review the configuration of your custom extension. Once you’re happy with the configuration hit ‘Create’ to create the Custom Extension within Entra ID Identity Governance.
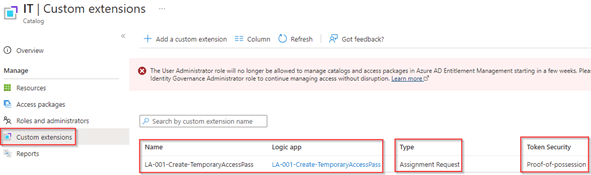
As you can see, we have now created a Custom Extension within the ‘IT’ catalog based on ‘Assignment Request’. The Token security column shows the sociated auth security framework, for all Custom Extensions created after March 17th this is set to proof-of-possession (PoP). Which indicates that if the token leaks it can’t be used by anyone else.
Now the ‘Custom Extension’ is ready let’s configure it to be used within an Access Package.
Step 2: Using the ‘Custom Extension’ in Access Packages
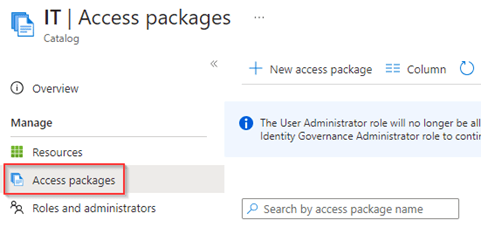
The first step after you’ve created the ‘Custom Extension’ is to create a new Access Package or edit an existing one to use the ‘Custom Extension’. In my example I’ve created a new one called ‘Request Temporary Access Pass’ within the IT catalog with the following generic settings:
- The access packages is enabled for users (all members) in my directory (as guests can’t request a Temporary Access Pass).
- The access package has approval required by the manager of the user and a fallback to the IT department.
- The access package is enabled for new requests so it can be requested directly.
- The access package has the expiration set to two days (as the TAP will be valid for a maximum of 2 days).
NOTE: If this is the first time you run through the wizard of creating an access package and don’t know what I’m talking about please read my first blog first.
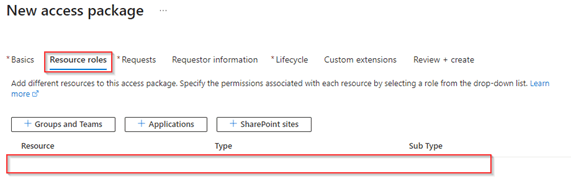
Important within this access package is that I’ve NOT included any resources as you can see below. This as we only want to trigger the custom extension which fires the logic app.

Furthermore, I’ve requested the user (during the request) to fill in more questions why it actually needs the Temporary Access Pass, this helps during the approval process to determine if this is a valid request, and we can use these answers and values within the Logic App later on.
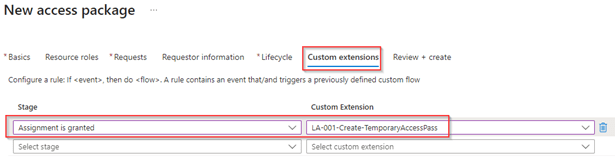
And at last, we have selected the custom extension during the stage ‘Assignment is granted’, this stage is after the approval process so only for approved requests the custom extension is triggered, and the Temporary Access Pass will be created.
Now the ‘Access Package’ & ‘Custom Extension’ is ready and created, let’s configure the Logic App and the permissions it needs to run successfully, generated the Temporary Access Pass and send it over to the user.
Step 3: Customizing the Logic App and providing permissions
After you’ve created the access package and custom extension it’s time to fully prepare the logic app. The first step in this process is to go to the logic app, hit ‘Identity’ and on ‘System assigned’ toggle the switch to ‘On’ and hit ‘Save’. This will make sure the Logic App has a system assigned Managed Identity which we can provide permissions.
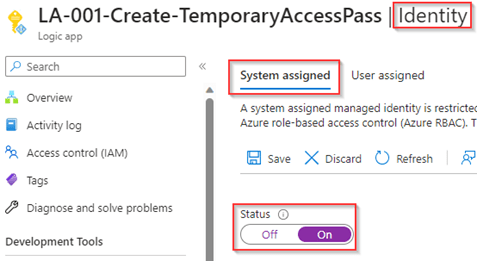
Once this is saved the ‘ObjectID’ of the Managed Identity (service principal) is shown, please note this down.

Now edit the ‘$managedIdentityId’ to reflect the ObjectID shown in the previous step and run the scrip to provide the Managed Identity User.Read.All permissions in Microsoft Graph to retrieve more user details of the user during the Logic App run.
#Import Modules
Import-Module Microsoft.Graph.Applications

#Connect with the right permission scopes
Connect-MgGraph -Scopes Application.Read.All, AppRoleAssignment.ReadWrite.All, RoleManagement.ReadWrite.Directory

#Configure Variables
$managedIdentityId = "ObjectID of ServicePrincipal"
$roleName = "User.Read.All"

#Retrieve additional Details
$msgraph = Get-MgServicePrincipal -Filter "AppId eq '00000003-0000-0000-c000-000000000000'"
$role = $Msgraph.AppRoles| Where-Object {$_.Value -eq $roleName}

#Assign application permissions to Managed Identity
New-MgServicePrincipalAppRoleAssignment -ServicePrincipalId $managedIdentityId -PrincipalId $managedIdentityId -ResourceId $msgraph.Id -AppRoleId $role.Id
NOTE: The above script can also be found here on my Github account.
Now the Graph permissions are taken care of we are going to assign the ‘Authentication Administrator’ role to the Managed Identity, we do this to make sure the Managed Identity doesn’t have the permissions to reset the authentication of privileged accounts (i.e. accounts which are having the Global Administrator permissions).
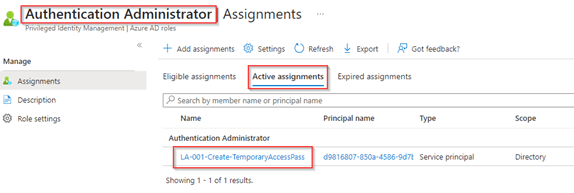
NOTE: These permissions need to be assigned permanently active.
Once ready, let’s edit the Logic App and after the ‘When a HTTP request is received’ hit ‘Add an action’.

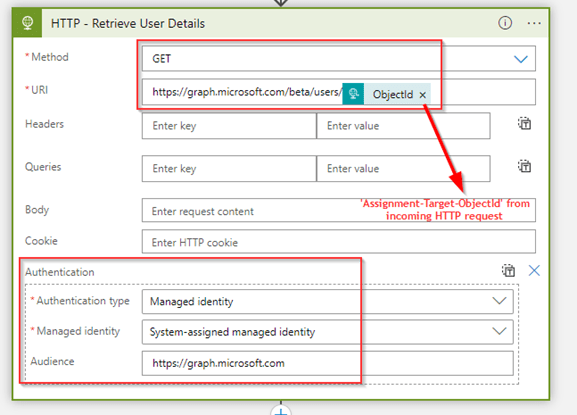
Select ‘HTTP’ as the connector, select ‘GET’ as method and use ‘https://graph.microsoft.com/beta/users/ObjectId’ as the URI. Once ready make sure that under ‘Authentication’ the ‘Managed identity’ is selected with the audience ‘https://graph.microsoft.com’.
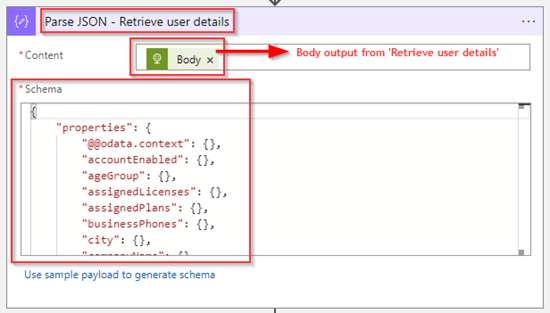
In the next step, make sure to parse the results of the output from the previous step ‘Retrieve User Details’, in my case I decided to match the schema to make sure all properties do exist and with that these are easy to select later within the logic app.
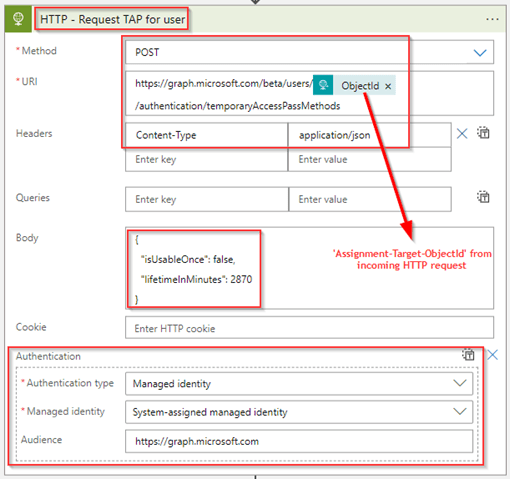
After this step it’s time to create a Temporary Access Pass, for that add another ‘HTTP’ action with ‘POST’ as method and with ‘https://graph.microsoft.com/beta/users/ObjectId/authentication/temporaryAccessPassMethods’ as the URI. Next make sure that within the headers the ‘Content-Type’ is set to ‘application/json’ and use the text below as body:
{
  "isUsableOnce": false,
  "lifetimeInMinutes": 2870
}
As a last step again make sure that within ‘Authentication’ the ‘Managed identity’ is selected with the audience again is set to ‘https://graph.microsoft.com’.
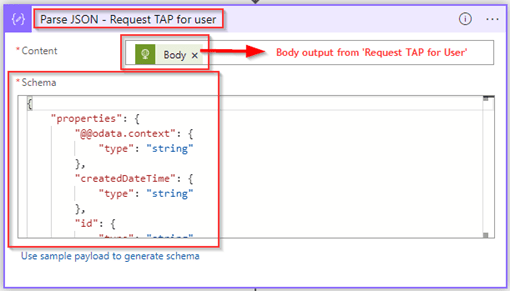
In the next step, we again make sure to parse the results of the output from the previous step ‘Request TAP for user’. Again, here I’ve made sure that the response should match the schema defined in the ‘Schema’ section.
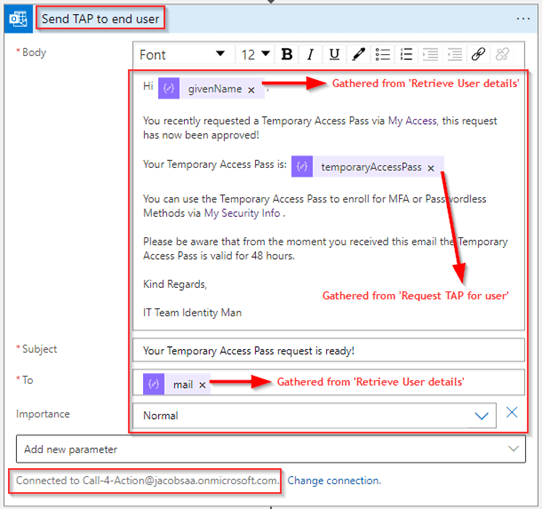
Now the user details are retrieved, and the TAP is generated let’s make sure that these details are send out to the end user with the ‘Send Email’ task within logic apps. As you can see, I’ve built the body of te email based on several attributes from the user which I gathered in earlier steps in the logic app, with that it will send out the email with the desired body text to the end user via email. You can of course choose to use a different method (i.e. SMS) to send the Temporary Access Pass to the end user, this is just an example.
NOTE: Unfortunately, this step requires to have a user account connected, so for that I’ve used a ‘generic account’.
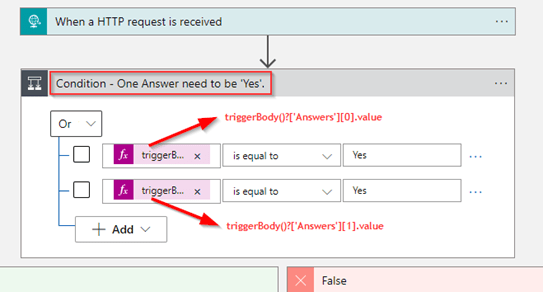
Now what you optionally could do as well is filter on the answers given during the Access Package Request as these are passed to the Logic App as well. Below is seen these are captured in an array called ‘answers’ and are always send over in the same order which makes it easy to predict which array number you need to filter on.
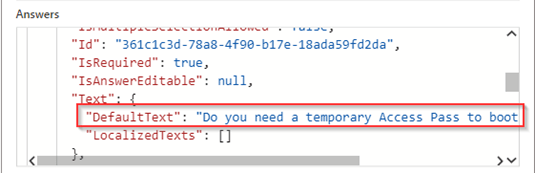
So, what we want to do in this case is, if either of the answers ‘Do you need a temporary Access Pass to bootstrap MFA?’ OR ‘Do you need a temporary Access Pass to bootstrap Passwordless?’ are set to ‘Yes’. We want to let the Logic App execute steps, if not it shouldn’t do anything, this can easily be configured with the ‘Condition’ shown below, in which I’ve filtered on the first two values in the array, whereby one of them should be set to ‘Yes’.
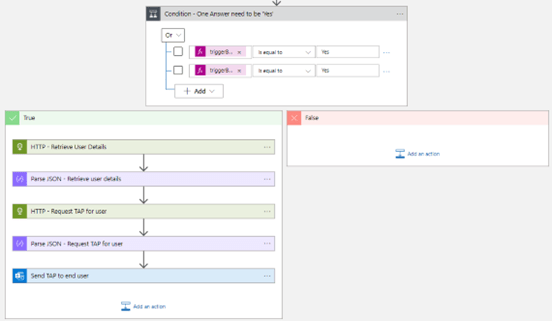
If one of the results for the conditions is ‘True’ the user will be gathered, the Temporary Access Pass will be created and the user will receive an email, this as shown below.
NOTE: A copy of the above logic app can be found here on my GitHub.
Now the logic app configuration is complete we can start testing it out and look at the end user experience!
Step 4: End user experience
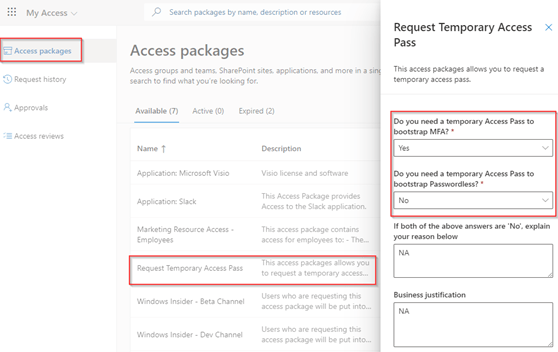
When we look at the user experience, we start of course from the MyAccess page with our Johny.Bravo@identity-man.eu account, we hit the ‘Request Temporary Access Pass’ Access Packge and fill in the mandatory questions and once ready, hit ‘Request Access’.
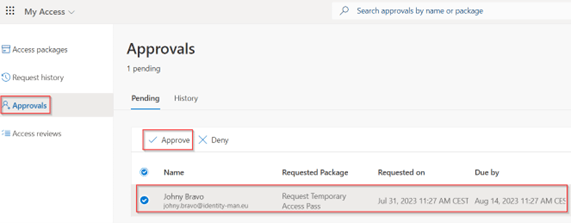
Once done the manager of Johny.Bravo@identity-man.eu will receive an email with an access package request to approve, when the user goes to the MyAccess portal and hits ‘Approvals’ on the left hand side, the pending approval for ‘Johny Bravo’ pops up and is ready to be approved.
Once the manager hits approved the Logic App kicks-in and based on the answers either the user will receive an email with a Temporary Access Pass, or the user won’t receive anything as the user didn’t answer their questions correctly (for that you could add additional steps as per your convenience of course).

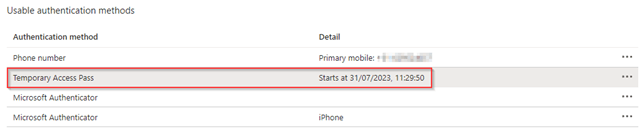
Beneath the user account in Microsoft Entra ID we can also see that the Temporary Access Pass has been added under the usable authentication methods.
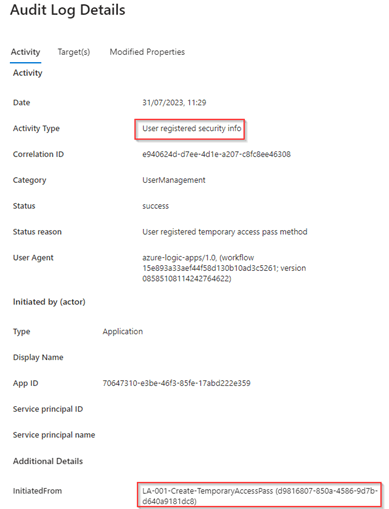
And within the ‘Audit Logs’ we can see that the Temporary Access pass method has been added by the Logic App which was triggered, in our case LA-001-Create-TemporaryAccessPass.
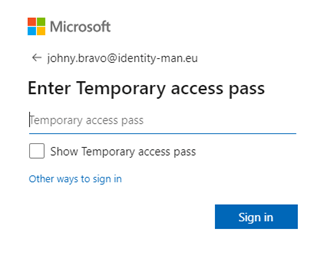
Once the user now goes to their Security Info, they can, i.e., register their FIDO2 key (which requires strong authentication for registration) with their Temporary Access Pass.
Doing this can, i.e., be very helpful to onboard FIDO2 keys in your environment where your users didn’t register for MFA yet and for that reason need a Temporary Access Pass for onboarding their FIDO2 key. Besides there are many other ‘challenges’ which we can solve by the use of custom extensions in Access Packages, sky is the limit here!
Now let’s wrap up to the conclusion.
Conclusion
Now we’ve walked through the above 4 steps, you know what the hidden gems are of the ‘Custom Extension in Entra ID Governance Access Packages’. You know how you can create a custom extension; you know how you can make use of the custom extension within an access package and which options there are. Besides you know how to ‘customize’ the Logic App to your own needs and are aware how to assign the right permissions to the managed identity and have seen the user experience.
With this we can conclude that with the use of ‘Custom Extensions’ in access packages ‘Sky is the limit’, you can resolve a lot of scenarios which aren’t available out of the box in access packages and even better you can even filter on the answers given in the access package request from within the Logic App as you’ve seen.
Furthermore, with the above example you can let your users create their own Temporary Access Passes (with approval) in your environment. If you want to use this example in production, you need to think about whether you want to enforce Multi-Factor Authentication on the My Access portal. Recently Microsoft published an application called ‘Azure AD Identity Governance – Entitlement Management‘ whereby you can exclude the My Access portal from Conditional Access Policies (as shown below).
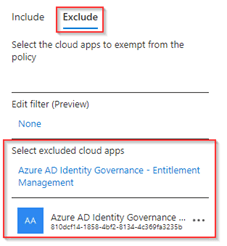
By excluding the app from the Multi-Factor Authentication Conditional Access policies, users can request the Temporary Access Pass Access Package without being prompted for MFA. Of course, you need to find a different way within the Logic App to get the Temporary Access Pass to end users if they probably can’t access their email (SMS could be an option here as example).
With that being said, I hope you enjoyed reading this new blog within the Azure AD Identity Governance series! Stay tuned for my next blog which will be all about the hidden gem ‘Power of delegation and reporting in Access Packages, whereby we will take a closer look in the delegation options we have in catalogs and which reporting options are available.
- An Introduction to Azure AD Identity Governance
- Identity Governance 1 of 10: Implementing a Strong Identity Foundation
- Identity Governance 2 of 10: Implementing Identity Lifecycle management for guest users – part 1
- Identity Governance 2 of 10: Implementing Identity Lifecycle management for guest users – part 2
- Identity Governance 2 of 10: Implementing Identity Lifecycle management for guest users – part 3
- Identity Governance 3 of 10: Configuring Provisioning in 3rd party apps for (guest) users
- Identity Governance 4 of 10: Implementing LifeCycle Workflows – Configure the basics
- Identity Governance 4 of 10: Implementing LifeCycle Workflows – Configure onboarding workflows
- Identity Governance 4 of 10: Implementing LifeCycle Workflows – Configure offboarding workflows
- Identity Governance 5 of 10: Using the hidden gems in Azure AD access packages, all you need to know! – Part 1
- Identity Governance 5 of 10: Using the hidden gems in Azure AD access packages, all you need to know! – Part 2
- Identity Governance 5 of 10: Using the hidden gems in Azure AD access packages, all you need to know! – Part 3
- Identity Governance 5 of 10: Using the hidden gems in Azure AD access packages, all you need to know! – Part 4
- Identity Governance 6 of 10: Using the brand new Entra Inbound Provisioning API for Identity Lifecycle Management!
- Identity Governance 7 of 10: Recertify access by using Microsoft Entra Access Reviews! – Part 1
- Identity Governance 7 of 10: Recertify access by using Microsoft Entra Access Reviews! – Part 2
- Identity Governance 8 of 10: Implementing Privileged Identity Management
- Identity Governance 9 of 10: Implementing a Terms of use
- Identity Governance 10 of 10: Review by Monitoring and reporting

How do i get hold of a end users COnnected Organisation name in a custom extension event RequestAssignemtGranted in a logic app within Entitle Managemetn. The value provided in the HTTP request to Logic App is NULL alsways when trying to automate a user creation
LikeLike
Hi Fredrik,
The connected organization name can be retrieved by updating the Connected Organization (just provide a change to retrieve the displayname and description in Logic Apps. I think this is caused by an update whereby we need to trigger a change to get this working for connected organizations which already exist for a longer time.
For me after the update it’s working as you can see (please be aware the ID is the ID of the connected organzation, not the tenant ID:
“Target”: {
“Tenant”: null,
“ConnectedOrganizationId”: “774bafa8-9e01-4dd0-9685-1b77eebfe5ff”,
“ConnectedOrganization”: {
“Id”: “774bafa8-9e01-4dd0-9685-1b77eebfe5ff”,
“DisplayName”: “InSpark”,
“Description”: “Connected Org. InSpark”
},
LikeLike